Tuesday, March 22, 2016

Configuring RStudio Server for Oracle R Enterprise

In this blog post I will show you the configurations that are necessary for RStudio Server to work with Oracle R Enterprise on your Oracle Database server. In theory if you have just installed ORE and then RStudio Server, everything should work, but if you encounter any issues then check out the following.

Before I get started make sure to check out my previous blog posts on installing R Studio Server. The first blog post was installing and configuring RStudio Server on the Oracle BigDataLite VM. This is an automated install. The second blog post was a step by step guide to installing RStudio Server on your (Oracle) Linux Database Server and how to open the port on the VM using VirtualBox.

Right. Let's get back to configuring to work with Oracle R Enterprise. The following assumes you have complete the second blog post mentioned above.

1. Edit the rserver.conf files

Add in the values and locations for RHOME and ORACLE_HOME

sudo vi /etc/rstudio/rserver.conf
    rsession-ld-library-path=RHOME/lib:ORACLE_HOME/lib

2. Edit the .Renviron file.

Add in the values for ORACLE_HOME, ORACLE_HOSTNAME and ORACLE_SID

cd /home/oracle
sudo vi .Renviron
    ORACLE_HOME=ORACLE_HOME
    ORACLE_HOSTNAME=ORACLE_HOSTNAME
    ORACLE_SID=ORACLE_SID
 
export ORACLE_HOME
export ORACLE_HOSTNAME
export ORACLE_SID

3. To access the Oracle R Distribution

Add the following to the usr/lib/rstudio-server/R/modules/SessionHelp.R file for the version of Oracle R Distribution you installed prior to installing Oracle R Enterprise.

.rs.addFunction( "httpdPortIsFunction", function() {
   getRversion() >= "3.2"
})

You are all done now with all the installations and configurations.

Thursday, March 17, 2016

Installing RStudio Server on an (Oracle) Linux server

In a previous blog post I showed how you can install and get started with using RStudio on a server by using RStudio Server. My previous post showed how you could do that on the Oracle BigDataLite VM. On this VM everything was nicely scripted and set up for you. But when it comes to installing it on a different server, well things can be a bit different.

The purpose of this blog post is to go through the install steps you need to follow on your own server or Oracle Database server. The following is based on a server that is setup with Oracle Linux. (I'm actually using the Oracle DB Developer VM).

1. Download the latest version of RStudio Server.

Use the following link to download RStudio Server. But do a quick check on the RStudio server to get the current version number.

wget https://download2.rstudio.org/rstudio-server-rhel-0.99.892-x86_64.rpm

The following shows you what you will see when you run this command.

--2016-03-16 06:22:30--  https://download2.rstudio.org/rstudio-server-rhel-0.99.892-x86_64.rpm
Resolving download2.rstudio.org (download2.rstudio.org)... 54.192.28.107, 54.192.28.54, 54.192.28.12, ...
Connecting to download2.rstudio.org (download2.rstudio.org)|54.192.28.107|:443... connected.
HTTP request sent, awaiting response... 200 OK
Length: 38814908 (37M) [application/x-redhat-package-manager]
Saving to: ‘rstudio-server-rhel-0.99.892-x86_64.rpm’

100%[============================================================>] 38,814,908  6.54MB/s   in 6.0s  

2016-03-16 06:22:37 (6.17 MB/s) - ‘rstudio-server-rhel-0.99.892-x86_64.rpm’ saved [38814908/38814908]

2. Install RStudio Server

sudo yum install --nogpgcheck rstudio-server-rhel-0.99.892-x86_64.rpm

when prompted if it is OK to install, enter y (highlighted in bold below)

Loaded plugins: langpacks
Examining rstudio-server-rhel-0.99.892-x86_64.rpm: rstudio-server-0.99.892-1.x86_64
Marking rstudio-server-rhel-0.99.892-x86_64.rpm to be installed
Resolving Dependencies
--> Running transaction check
---> Package rstudio-server.x86_64 0:0.99.892-1 will be installed
--> Finished Dependency Resolution
ol7_UEKR3/x86_64                                                                    | 1.2 kB  00:00:00    
ol7_addons/x86_64                                                                   | 1.2 kB  00:00:00    
ol7_latest/x86_64                                                                   | 1.4 kB  00:00:00    
ol7_optional_latest/x86_64                                                          | 1.2 kB  00:00:00    

Dependencies Resolved

===========================================================================================================
 Package               Arch          Version             Repository                                   Size
===========================================================================================================
Installing:
 rstudio-server        x86_64        0.99.892-1          /rstudio-server-rhel-0.99.892-x86_64        280 M

Transaction Summary
===========================================================================================================
Install  1 Package

Total size: 280 M
Installed size: 280 M

Is this ok [y/d/N]: y

Downloading packages:
Running transaction check
Running transaction test
Transaction test succeeded
Running transaction
  Installing : rstudio-server-0.99.892-1.x86_64                                                        1/1
groupadd: group 'rstudio-server' already exists
rsession: no process found
ln -s '/etc/systemd/system/rstudio-server.service' '/etc/systemd/system/multi-user.target.wants/rstudio-server.service'
rstudio-server.service - RStudio Server
   Loaded: loaded (/etc/systemd/system/rstudio-server.service; enabled)
   Active: active (running) since Wed 2016-03-16 10:46:00 PDT; 1s ago
  Process: 3191 ExecStart=/usr/lib/rstudio-server/bin/rserver (code=exited, status=0/SUCCESS)
 Main PID: 3192 (rserver)
   CGroup: /system.slice/rstudio-server.service
           ├─3192 /usr/lib/rstudio-server/bin/rserver
           └─3205 /usr/lib64/R/bin/exec/R --slave --vanilla -e cat(R.Version()$major,R.Version()$minor,~+~sep=".")

Mar 16 10:46:00 localhost.localdomain systemd[1]: Started RStudio Server.
  Verifying  : rstudio-server-0.99.892-1.x86_64                                                        1/1

Installed:
  rstudio-server.x86_64 0:0.99.892-1                                                                      

Complete!

3. Open RStudio using a web browser.

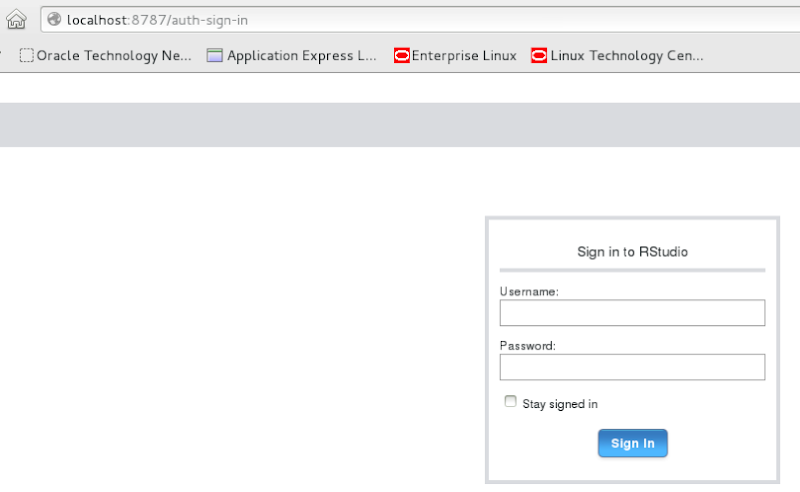
Open your favourite web browser and put in the host name or the IP address of your server. In my example I'm using the Oracle DB Developer VM to demonstrate the install, so I can use localhost, followed by the port number for RStudio Server.

NewImage Log in using your Server username and password. This is oracle/oracle on the VM. NewImage

4. Use and Enjoy

If you get logged into RStudio Server then you will see a screen something like the following!

Job Done and Enjoy!


5. An Extra Step is using the Oracle DB Developer VM

If you want to use RStudio on the Oracle DB Developer VM from your local OS, then you will need to open the port 8787 on the VM. To do this power down the VM, if you have it open. The open the Network section of the VM settings. I'm using VirtualBox. And then click on the Port Forwarding.

NewImage NewImage

Click on OK to save your Port Forwarding setting and then click on the OK button again to close the Network settings for the VM.

Now start up the VM. When it has loaded and you have the desktop displayed in the VM window, you should now be able to connect to RStudio in the VM, from your local machine.

To do this open your web browser on your local machine and type in

http://localhost:8787

You should now get the RStudio login in screen that is shown in point 3 above. Go ahead, login and enjoy.

6. A little warning

Make sure to log out of RStudio when you are finished using it. If you don't then your R environment may not have been saved and you will get a message when you log in next. Now we don't want that happenings, so just log out of RStudio. You can do that by looking at the top right hand corner of the RStudio Server application.

I will have one more blog post on how you can configure RStudion Server to work with an Oracle Database server that has Oracle R Enterprise installed.

Monday, March 14, 2016

Installing RStudio Server on Oracle BigDataLite VM

A very popular tool for data scientists is RStudio. This tool allows you to interactively work with your R code, view the R console, the graphs and charts you create, manage the various objects and data frames you create, as well shaving easy access to the R help documentation. Basically it is a core everyday tool.

The typical approach is to have RStudio installed on your desktop or laptop. What this really means is that the data is pulled to your desktop or laptop and all analytics is performed there. In most cases this is fine but as your data volumes goes does does the limitations of using R on your local machine.

An alternative is to install a version called RStudio Server on an analytics server or on the database server. You can now use the computing capabilities of this server to overcome some of the limitations of using R or RStudio locally. Now you will use your web browser to access RStudio Server on your database server.

In this blog post I will walk you through how to install and get connected to RStudio Server on the Oracle BigDataLite VM.

NewImage

After starting up the Oracle BigDataLite VM and logging into the Oracle user (password=welcome1) you will see the Start Here icon on the desktop. You will need to double click on this.

NewImage

This will open a webpage on the VM that contains details of all the various tools that are installed on the VM or are ready for you to install and configure. This information contains all the http addresses and ports you need to access each of these tools via a web browser or some other way, along with the usernames and passwords you need to use them.

NewImage

One of the tools lists is for RStudio Server. This product is not installed on the VM but Oracle has provided a script that you can run to perform the install in an automated way. This script is located in:

[oracle@bigdatalite ~]$ cd  /home/oracle/scripts/

Use the following command to run the RStudio Server install script.

[oracle@bigdatalite scripts]$ ./install_rstudio.sh
The following is the output from running this script and it will be displayed in your terminal window. You can use this to monitor the progress of the installation.
Retrieving RStudio
--2016-03-12 02:06:15--  https://download2.rstudio.org/rstudio-server-rhel-0.99.489-x86_64.rpm
Resolving download2.rstudio.org... 54.192.28.12, 54.192.28.54, 54.192.28.98, ...
Connecting to download2.rstudio.org|54.192.28.12|:443... connected.
HTTP request sent, awaiting response... 200 OK
Length: 34993428 (33M) [application/x-redhat-package-manager]
Saving to: `rstudio-server-rhel-0.99.489-x86_64.rpm'

100%[======================================>] 34,993,428  5.24M/s   in 10s     

2016-03-12 02:06:26 (3.35 MB/s) - `rstudio-server-rhel-0.99.489-x86_64.rpm' saved [34993428/34993428]

Installing RStudio
Loaded plugins: refresh-packagekit, security, ulninfo
Setting up Install Process
Examining rstudio-server-rhel-0.99.489-x86_64.rpm: rstudio-server-0.99.489-1.x86_64
Marking rstudio-server-rhel-0.99.489-x86_64.rpm to be installed
public_ol6_UEKR3_latest                                  | 1.2 kB     00:00     
public_ol6_UEKR3_latest/primary                          |  22 MB     00:03     
public_ol6_UEKR3_latest                                                 568/568
public_ol6_latest                                        | 1.4 kB     00:00     
public_ol6_latest/primary                                |  55 MB     00:12     
public_ol6_latest                                                   33328/33328
Resolving Dependencies
--> Running transaction check
---> Package rstudio-server.x86_64 0:0.99.489-1 will be installed
--> Finished Dependency Resolution

Dependencies Resolved

================================================================================
 Package        Arch   Version       Repository                            Size
================================================================================
Installing:
 rstudio-server x86_64 0.99.489-1    /rstudio-server-rhel-0.99.489-x86_64 251 M

Transaction Summary
================================================================================
Install       1 Package(s)

Total size: 251 M
Installed size: 251 M
Downloading Packages:
Running rpm_check_debug
Running Transaction Test
Transaction Test Succeeded
Running Transaction
  Installing : rstudio-server-0.99.489-1.x86_64                             1/1 
useradd: user 'rstudio-server' already exists
groupadd: group 'rstudio-server' already exists
rsession: no process killed
rstudio-server start/running, process 5037
  Verifying  : rstudio-server-0.99.489-1.x86_64                             1/1 

Installed:
  rstudio-server.x86_64 0:0.99.489-1                                            

Complete!
Restarting RStudio
rstudio-server stop/waiting
rsession: no process killed
rstudio-server start/running, process 5066

When the installation is finished you are now ready to connect to the RStudio Server. So open your web browser and enter the following into the address bar.

http://localhost:8787/

NewImage

The initial screen you are presented with is a login screen. Enter your Linux username and password. In the case of the BigDataLite VM this will be oracle/welcome1.

NewImage

Then you will be presented with the RStudio Server application in your web browser, as shown below. As you can see it is very similar to using RStudio on your desktop. Happy Days! You are now setup and able to run RStudio on the database server.

NewImage

Make sure to log out of RStudio Server before closing down the window.

NewImage

If you don't log out of RStudio Server then the next time you open RStudio Server your session will automatically open. Perhaps this is not the best for security, so try to remember to log out each time.

By now using RStudio Server on the Oracle Database server I can not get some of the benefits of computing capabilities of this server. Although there are still the typical limitations with of using R. But now I access RStudio on the database server and process the data on the database server, all from my local PC or laptop.

Everything is nicely setup and ready for you to install on the BigDataLite VM (thank you Oracle). But what about when we want to install RStudion Server on a different server. What are the steps necessary to install, configure and log in. Yes they should be similar but I will give a complete list of steps in my next blog post.
Tuesday, March 8, 2016

OUG Ireland 2016: a roaring success

Last week we had out OUG Ireland annual conference. Traditionally it has been a 1 day conference and in the past few years we have had an extra day where we had the likes of Tom Kyte (we miss you), Maria Colgan, etc give a full day seminar.

But over the past few years a few of the committee have been constantly asked about when we would have a second day of presentations (just like we have for the one day event).

After lots of discussions and looking at budgets and relooking at budgets, then looking at possible alternative venues we worked out a way to have a 2 day conference.

So last week we had our new 2 day conference in the Gresham hotel in the centre of Dublin. Check out the agenda here.

The day before the conference (on the Wednesday) I had arranged for a speakers drinks meet-up. There was lots of people travelling in from all across Europe to present, so this was a good way to get everyone together over a few beers. We met in a micro brewery in Dublin. It was a fun evening with people coming and going throughout the evening and some people stayed for the entire evening. (Oh my poor credit card!)

On Thursday we all got together with all the 275+ attendees at in the Gresham Hotel.

NewImage

We had 4 tracks that covered DBA, Developer, Business Analytics and Apps. The rooms were just the right size for these tracks, with most of the rooms being full for each of the presentations. With some presentations there was people standing around the sides and down the back. All of this helped to add to the atmosphere. The exhibitors were only there for the first day. This is something we need to look at for next year to get them to attend the 2 days.

On the Wednesday evening we had an Oracle ACE Dinner that was sponsored by OTN (THANK YOU) and they also provided the ACEs with conference ribbons. Also thank you to the OTN ACE programme for providing some travel support to the various ACE Directors.

On the second day (Friday) we kind of got of a slow start for the first sessions of the day, but this must have been due to the snow we had in Dublin that morning. But from the second sessions onwards we were back to packed rooms. Because of this great turn out on the second day, helps us justify having a 2 day conference next years.

I got a chance to talk to lots and lots of people over the course of the 2 days and every single person was talking about the conference being 2 days and Please doing this next year and the year after and the year after, etc.

One of the highlights from the end of the second day was the Q&A panel discussion on the Oracle Optimiser. On this panel we had Jonathan Lewis, Joze Senegacnik and Martin Widlake. I managed to rope in a friend Alan Kelly to be the quiz master for the session. The Q&A Panel session was scheduled for 45minutes. But despite the best efforts to encourage the attendees to finished up, they kept on asking questions and the panel kept on answering. This session ran for an additional 45 minutes. Yes that was a 90 minute session.

NewImage

All in all the 2 day OUG Conference was a roaring success and I would like to thank all the speakers, the attendees and the various sponsors for making this event happen.

Check out Debra's blog post about the conference.

Check out Martin Widlake's blog post about the conference.

Oh and there was a Yeast and Sourdough Bread Making symposium during OUG Ireland where a number of the peoples got to talk about and share their experiences on making bread.

Thursday, February 25, 2016

Recoding variable values using ore.recode

Oracle R Enterprise comes with a vast array of features that not really documented anywhere. One of these features that I've recently found useful is the ore.recode() function.

The following code illustrates how you can records the values in an existing attributes or (more specifically in this example) how you can create a new attribute based on the values in another attribute.

The data set that I'm using is the White Wine data set that can be found on the UCI Machine Learning Repository Archive website. You can download this data set and load it into a table in your Oracle schema using just two commands.

> WhiteWine = read.table("http://archive.ics.uci.edu/ml/machine-learning-databases/wine-quality/winequality-white.csv",
                        sep=";", header=TRUE)
> ore.create(WhiteWine, table="WHITE_WINE")

This data set has an attribute called "quality". This "quality" attribute contains values ranging from 2 to 8, and indicates the quality of the wine.

A typical task you may want to do is to relabel values into attributes to something a bit more meaningful or to group some values into a more standardised value.

To demonstrate this I want to create a new attribute that contains a description of the type of wine (and who I might share it with).

In this case, and to allow for other values in future versions of the data sets I've coded up the following:

quality  grade
-------  ----------------
1        Paint Stripper
2        Vinegar
3        Barely Drinkable
4        For the in-laws
5        For my family
6        To share with friends
7        For cooking
8        To share with my wife
9        Mine all Mine

The next step we need to perform is to gather some information about the values in the "quality" attribute. We can use the table command to quickly perform the aggregations, and then use the marplot function to graph the distributions.

> WHITE_WINE2 <- WHITE_WINE
> table(WHITE_WINE2$quality)
> barplot(table(WHITE_WINE2$quality), xlab="Wine Quality Ranking")

NewImage

Now we are ready to perform the recoding of the values using the ore.recode() function.

> WHITE_WINE2$grade <- ore.recode(WHITE_WINE2$quality, old=c(1, 2, 3, 4, 5, 6, 7, 8, 9), 
                     new=c("1-Paint Stripper", "2-Vinegar", "3-Barely Drinkable",
                           "4-For the in-laws", "5-For my family", "6-To share with friends", 
                           "7-For cooking", "8-To share with my wife", 
                           "9-Mine all Mine"))

You can now go and inspect the data, perform a frequency count and compare the values with what we had previously.

> head(WHITE_WINE2[,c("quality", "grade")]) 
> table(WHITE_WINE2$grade) 

The final step is to write the newly modified data set back to your Oracle schema into a new table. This is to ensure that the original data is modified so that it can be used or reused later.

> ore.create(WHITE_WINE2, "WHITE_WINE2")

Thursday, February 18, 2016

OUG Ireland 2016: APPs Track highlights

Today I was joined by Debra Lilly who is the APPs track lead and conference chair for OUG Ireland. Debra lets us know what we can look forward to on the APPs track at this years conference.

Check out Debra's video.

Click on the image below to get more details of the agenda and to register for this 2 day conference.

NewImage

Follow the conference and OUG Ireland on twitter using #oug_ire

Monday, February 15, 2016

OUG Ireland 2016: DBA and Developer track highlights

This morning I records a short video (1:18m) view with Simon Holt giving a quick overview and some highlights of the DBA and Developer tracks for the upcoming OUG Ireland 2016 conference.

Click on the image below to get more details of the agenda and to register for this 2 day conference.

NewImage

Follow the conference and OUG Ireland on twitter using #oug_ire

Friday, February 12, 2016

Spark versus Flink

Spark is an open source Apache project that provides a framework for multi stage in-memory analytics. Spark is based on the Hadoop platform and can interface with Cassandra OpenStack Swift, Amazon S3, Kudu and HDFS. Spark comes with a suite of analytic and machine learning algorithm allowing you to perform a wide variety of analytics on you distribute Hadoop platform. This allows you to generate data insights, data enrichment and data aggregations for storage on Hadoop and to be used on other more main stream analytics as part of your traditional infrastructure. Spark is primarily aimed at batch type analytics but it does come with a capabilities for streaming data. When data needs to be analysed it is loaded into memory and the results are then written back to Hadoop.

NewImage

Flink is another open source Apache project that provides a platform for analyzing and processing data that is in a distributed stream and/or batch data processing. Similarly to Spark, Flink comes with a set of APIs that allows for each integration in with Java, Scala and Python. The machine learning algorithms have been specifically tuned to work with streaming data specifically but can also work in batch oriented data. As Flink is focused on being able to process streaming data, it run on Yarn, works with HDFS, can be easily integrated with Kafka and can connect to various other data storage systems.

NewImage

Although both Spark and Flink can process streaming data, when you examine the underlying architecture of these tools you will find that Flink is more specifically focused for streaming data and can process this data in a more efficient manner.

There has been some suggestions in recent weeks and months that Spark is now long the tool of choice for analytics on Hadoop. Instead everyone should be using Flink or something else. Perhaps it is too early to say this. You need to consider the number of companies that have invested significant amount of time and resources building and releasing products on top of Spark. These two products provide similar-ish functionality but each product are designed to process this data in a different manner. So it really depends on what kind of data you need to process, if it is bulk or streaming will determine which of these products you should use. In some environments it may be suitable to use both.

Will these tool replace the more traditional advanced analytics tools in organisations? the simple answer is No they won't replace them. Instead they will complement each other and if you have a Hadoop environment you will will probably end up using Spark to process the data on Hadoop. All other advanced analytics that are part of your more traditional environments you will use the traditional advanced analytics tools from the more main stream vendors.

Tuesday, February 2, 2016

ORE video : Demo Code Part 5

The following is the fifth and final set of demo code from my video on using R in the Oracle Database. Check out the video before using the following code. The blog post for the video will be updated to contain links to all blog posts that have the various demo code.

The following examples illustrate how you can use the Oracle R Enterprise capabilities within SQL and PL/SQL. The following illustrate building a GLM model using the glm algorithm that comes with the R language, and then uses this mode to score or label new data that is stored in a table. The last part of the example illustrates how you can perform What-If analysis using this ORE model

-- Build & save the R script, called Demo_GLM in the DB
--  This builds a GLM  DM model in the DB
--
Begin
   sys.rqScriptDrop('Demo_GLM');
   sys.rqScriptCreate('Demo_GLM',
      'function(dat,datastore_name) {
          mod <- glm(AFFINITY_CARD ~ CUST_GENDER + AGE + CUST_MARITAL_STATUS + COUNTRY_NAME + CUST_INCOME_LEVEL + EDUCATION + HOUSEHOLD_SIZE + YRS_RESIDENCE, dat, family = binomial())
       ore.save(mod, name=datastore_name, overwrite=TRUE)   }');
end;
/

--
-- After creating the script you need to run it to create the GLM model
--
select * 	
from table(rqTableEval(
             cursor(select CUST_GENDER,
                           AGE,
                           CUST_MARITAL_STATUS,
                           COUNTRY_NAME,
                           CUST_INCOME_LEVEL,
                           EDUCATION,
                           HOUSEHOLD_SIZE,
                           YRS_RESIDENCE,
                           AFFINITY_CARD
                    from mining_data_build_v),
             cursor(select 1 as "ore.connect", 'myDatastore' as "datastore_name” from dual),
                  'XML', 'Demo_GLM' ));


--
-- There are 2 ways to use the GLM model : in Batch and in Real-Time mode
--
-- First Step : Build the in-database R script to score you new data
--
Begin
   sys.rqScriptDrop('Demo_GLM_Batch');
   sys.rqScriptCreate('Demo_GLM_Batch',
      'function(dat, datastore_name) {
      ore.load(datastore_name)
      prd <- predict(mod, newdata=dat)
      prd[as.integer(rownames(prd))] <- prd
      res <- cbind(dat, PRED = prd)
      res}');
end;
/

-- 
-- Now you can run the script to score the new data in Batch model
--   The data is located in the table MINING_DATA_APPLY
--
select * from table(rqTableEval(
              cursor(select CUST_GENDER, AGE, CUST_MARITAL_STATUS, COUNTRY_NAME, CUST_INCOME_LEVEL, EDUCATION, HOUSEHOLD_SIZE, YRS_RESIDENCE
                     from   MINING_DATA_APPLY_V
                     where rownum <= 10),
             cursor(select 1 as "ore.connect", 'myDatastore' as "datastore_name" from dual),
             'select CUST_GENDER, AGE, CUST_MARITAL_STATUS, COUNTRY_NAME, CUST_INCOME_LEVEL, EDUCATION, HOUSEHOLD_SIZE, YRS_RESIDENCE, 1 PRED from MINING_DATA_APPLY_V','Demo_GLM_Batch'))
order by 1, 2, 3;

--
-- Now let us use the Demo_GLM_Batch script to score data in Real-Time
--  The data values are passed to the GLM model
--
select * from table(rqTableEval(
              cursor(select 'M' CUST_GENDER,
                            23 AGE,
                            'Married' CUST_MARITAL_STATUS, 
                            'United States of America' COUNTRY_NAME,
                            'B: 30,000 - 49,999' CUST_INCOME_LEVEL, 
                            'Assoc-A' EDUCATION,
                            '3' HOUSEHOLD_SIZE, 
                            5 YRS_RESIDENCE
                     from dual),
              cursor(select 'myDatastore' "datastore_name", 1 "ore.connect" from dual),
                    'select CUST_GENDER, AGE, CUST_MARITAL_STATUS, COUNTRY_NAME, CUST_INCOME_LEVEL, EDUCATION, HOUSEHOLD_SIZE, YRS_RESIDENCE, 1 PRED from MINING_DATA_APPLY',
              'Demo_GLM_Batch')) order by 1, 2, 3; 

Wednesday, January 27, 2016

BIWA Summit : HOL notes for ODM using SQL

The following notes and documents are for the BIWA Summit 2016 attendees who are taking the HOL on using ODM using SQL and PL/SQL.

Getting connected to the Cloud

The following document outlines the steps you need to perform to get connected to the Cloud Database we are using.

If you have attended the HOL (yesterday) then you can reuse the same connection details (and number).

If you didn't attend the HOL yesterday then you will need to be assigned a Number Ask me or Charlie for this. After you get assigned a number then follow the instructions.

NewImage

It might be a good idea to download this document to your local machine.

HOL Notes

The following links are for the HOL documents. The first is the slides we will work through and this document contains the exercises that you will complete.

NewImage

The second document is demonstration script and contains all the code that is in the HOL slides document. Download load this file and open it in Worksheet in SQL Developer that is connected to your schema in the database. (Do not use the ODM connections and no need to open the ODM GUI).

NewImage

Wednesday, January 20, 2016

BIWA Summit 2016

The annual BIWA Summit 2016 will be next week from the 26-28 January, and it is back in Oracle HQ at Redwood Shores. If you are into the Oracle Database, Business Intelligence, Big Data, Advanced Analytics, etc then this is the conference for you.

NewImage

Over the 3 days there is an action packed agenda of 5 parallel tracks, plus a full 3 days of Hands-on Labs. The agenda is filled with the whos-who of the Oracle BI and Analytics world, so if this is your area then BIWA Summit is the conference for you and your training budget. (I'm sure it is not too late to book your place)

I've been lucky this year in that I will have 2 Hands-on Labs and 1 presentation to give. Yes that is 5 hours of presenting/hosting to do. The presentation I will be giving is 'Is Oracle SQL the best language for Statistics?' (on Tuesday 26th). This presentation is listed for the BIWA Summit and also for the NoCOUG Yes SQL conference that is running at the same time in the same venue (i.e. co-located). I've also written a brand new 2-hour Hands-on Lab titled 'Predictive Analytics using SQL and PL/SQL'. The first outing for this will be on Wednesday 27th. I will also be co-hosting, with Charlie Berger, the 'Learn Predictive Analytics in 2hours with Oracle Data Miner' Hands-on Lab on Tuesday 26th.

Come to my Hands-on Labs to be in with chance to win a copy of my book on Oracle Data Mining.

NewImage

Hopefully I'll see you there!

Check out the full agenda by clicking on the image below.

NewImage

Tuesday, January 19, 2016

ORE video : Demo Code Part 4

The following is the fourth set of demo code from my video on using R in the Oracle Database. Check out the video before using the following code. The blog post for the video will be updated to contain links to all blog posts that have the various demo code.

The following code example illustrate how you can build a Data Mining model using the in-database data mining algorithms. In this example a Decision Tree model is created. This model is then applied to new data, scoring this data with the predicted values.

> #
> # Build am in-database ODM Decision Tree
> #
> dtData <- ore.get("MINING_DATA_BUILD_V")
> # Create a ODM DT model in the DB : Only a temporary model. It is deleted when you logout
> dtModel <- ore.odmDT(AFFINITY_CARD ~ ., dtData)
> # View the details of the ODM model
> #summary(dtModel)
> names(dtModel)
 [1] "name"          "settings"      "attributes"    "costs"         "distributions”
 [6] "nodes"         "formula"       "extRef"        "call"         
> dtModel$name
 [1] "ORE$208_210”
> dtModel$settings
                          value
prep.auto                    on
impurity.metric   impurity.gini
term.max.depth                7
term.minpct.node           0.05
term.minpct.split           0.1
term.minrec.node             10
term.minrec.split            20
> dtModel$attributes
                 name        type data.type data.length precision scale is.target
1       AFFINITY_CARD categorical    number          22         0     0      TRUE
2                 AGE   numerical    number          22        NA    NA     FALSE
3 CUST_MARITAL_STATUS categorical  varchar2          20        NA    NA     FALSE
4           EDUCATION categorical  varchar2          21        NA    NA     FALSE
5      HOUSEHOLD_SIZE categorical  varchar2          21        NA    NA     FALSE
6          OCCUPATION categorical  varchar2          21        NA    NA     FALSE
7       YRS_RESIDENCE   numerical    number          22        NA    NA     FALSE
>

> ## Compute the Compusion Matrix
> dtResults <- predict(dtModel, dtData, "AFFINITY_CARD")
> with(dtResults, table(AFFINITY_CARD, PREDICTION))
             PREDICTION
AFFINITY_CARD    0    1
            0 1056   64
            1  201  179
> ## How do you persist the model in the DB
> ##     Rename and save the model in the database
> dtModel$name
 [1] "ORE$208_210"

> ## Save the ODM model in the in-database R datastore
> ore.save(dtModel, name = "ORE_MODELS", overwrite=TRUE)
> ore.load(name = "ORE_MODELS")
 [1] "dtModel"

> ## Score new data using the DM Model
> ore.sync(table = c("MINING_DATA_APPLY"))
> ore.ls()
 [1] "DEMO_R_APPLY_RESULT"   "DEMO_R_TABLE"          "DEMO_SUBSET_TABLE"    
 [4] "INSUR_CUST_LTV_SAMPLE" "MINING_DATA_APPLY"     "MINING_DATA_BUILD_V"  
 [7] "MINING_DATA_TEST_V"   > dtApply <- ore.get("MINING_DATA_APPLY")
> dim(dtApply)
 [1] 1500   18
> class(dtApply)
 [1] "ore.frame”
 attr(,"package")
 [1] "OREbase”
> DTAPPLY <- ore.push(dtApply)
> dtApplyResult <- predict(dtModel, DTAPPLY)

> dtApplyResult <- predict(dtModel, DTAPPLY)
> head(dtApplyResult)
             '0'        '1' PREDICTION
100001 0.9521912 0.04780876          0
100002 0.9521912 0.04780876          0
100003 0.9521912 0.04780876          0
100004 0.9521912 0.04780876          0
100005 0.2633745 0.73662551          1
100006 0.9521912 0.04780876          0
> dim(dtApplyResult)
 [1] 1500    3
> dim(dtApply)
 [1] 1500   18
> dtResults <- cbind(dtApply, dtApplyResult)
> dim(dtResults)
 [1] 1500   21
> ore.drop(table = "DEMO_R_APPLY_RESULT")
> ore.create(dtApplyResult, table="DEMO_R_APPLY_RESULT")
> ## Run the following for the first time you will rename a mode
> # ore.exec(paste("BEGIN> 
  #                  DBMS_DATA_MINING.RENAME_MODEL(model_name => '", dtModel$name, "',> 
  #                      new_model_name => 'DEMO_R_DT_MODEL'); END;",sep=""))> 
  ## Run the following to refresh an existing model
> ore.exec(paste("BEGIN
+ DBMS_DATA_MINING.DROP_MODEL('DEMO_R_DT_MODEL');
+ DBMS_DATA_MINING.RENAME_MODEL(model_name => '", dtModel$name,"',
+ new_model_name => 'DEMO_R_DT_MODEL');
+ END;",sep=""))