Thursday, July 18, 2013

Upgrading your ODM Repository for SQL Dev 4

For those users of Oracle Data Miner (ODM) that is part of SQL Developer, now that Oracle have finally released SQL Developer 4, you might want to upgrade to this new release. There are a lot of new features. Some of these are available for 11.2g and 12.1c databases and some are only available for 12.1c users.

I will have another blog post soon on the new Oracle Data Miner (ODM) features that are available in SQL Developer 4.

The instructions given below are what I did to upgrade so that I could use the new ODM tool/SQL Developer 4.

Step 1 – Install SQL Developer 4 : I have another blog post on what this involves, so check it out and complete the steps before you continue with the result of the steps below.

Step 2 – Make ODM Visible : After SQL Developer 4 opens you should see all your migrated connections. To make ODM visible you need to click on the Tools menu, select Oracle Data Miner and then Make Visible. This will open a number of tabs on the left hand side of SQL Developer. These will include Data Miner (connections), Workflow Structure and Workflow Jobs.

image

Step 3 – Open an ODM Connection : Take one your ODM connections and double click on it. SQL Developer 4 / ODM will check what versions of the ODM repository exists in your database. If this is your first time connecting from SQL Developer 4, you will be told that you will need to upgrade your repository

SNAGHTML19755c5

Step 4 – Upgrade the ODM Repository : Select the Yes button on the Upgrade Repository window. You will then be asked for the SYS password. If you do not have access to this you can talk nicely to your DBA and ask them to enter the password for you.

SNAGHTML198e42e

You may or may not get a warning message like the following. Just click OK to continue.

SNAGHTML199f5cb

Step 5 – Start the Repository Upgrade : When the Migrate Data Miner Repository window opens, just click the Start button. 

SNAGHTML19b0a35

This might be a good time to go off an make yourself a coffee. The upgrade process tool approx. 8 minutes on my laptop. If you were running this on a server located somewhere then the script will take a little bit longer to run!

The progress bar will let you know how things are progressing. It also gives some messages to let you known at what stage of the process it is at.

SNAGHTML19f591f

Step 6 – All finished : When the Repository Migration has finished you will get a window with a message saying Task Successfully Complete. Click on the Close button to close this window.

SNAGHTML1a0ffe9

Step 7 – Open an Existing Workflow : Just to make sure that everything has worked with the install and ODM Repository migration, open one of your existing workflows. If it opens then everything should be OK.

When you open the workflow, the new Workflow Editor tab opens on the right hand side of SQL Developer. This seems to have replaced the Component Palette we had with the pervious version of the ODM tool. Expand the headings under the Workflow Editor to see the different nodes that are available. Most of these are the same but we have 2 new nodes under the Data section. These are Graph and SQL Query. I’ll have more on these in another post or posts.

image

Wednesday, July 17, 2013

Auto-Starting your pluggables in 12c

After installing 12c you get your container database and a pluggable. But the problem that most people have is that when they restart their server or in my case my VMs the container database gets started but the pluggable database does not automatically start. This means that you have to manually go in an start it. But this is a pain. Surely there is an easy way to get your pluggable databases to start. You would have though that Oracle would have some easy way of doing this.  If there is, I haven’t found it yet.

But I have come across how to automatically start your 12c pluggable databases, using a trigger.

CREATE or REPLACE trigger OPEN_ALL_PLUGGABLES
   after startup
   on  database
BEGIN
   execute immediate 'alter pluggable database all open';
END open_all_pdbs;

Let us test this out.  I’ve started my VirtualBox VM that has 12c installed on Windows 7. Here is the code that I ran to verify that the container has been started and the pluggable is in MOUNTED mode.

C:\Users\oracle>sqlplus / as sysdba

SQL*Plus: Release 12.1.0.1.0 Production on Wed Jul 17 15:27:35 2013

Copyright (c) 1982, 2013, Oracle.  All rights reserved.


Connected to:
Oracle Database 12c Enterprise Edition Release 12.1.0.1.0 - 64bit Production
With the Partitioning, OLAP, Advanced Analytics and Real Application Testing opt
ions

SQL> select name,DB_UNIQUE_NAME from v$database;

NAME      DB_UNIQUE_NAME
--------- ------------------------------
ORCL      orcl

SQL> SELECT v.name, v.open_mode, NVL(v.restricted, 'n/a') "RESTRICTED", d.status

  2  FROM v$pdbs v, dba_pdbs d
  3  WHERE v.guid = d.guid
  4  ORDER BY v.create_scn;

NAME                           OPEN_MODE  RES STATUS
------------------------------ ---------- --- -------------
PDB$SEED                       READ ONLY  NO  NORMAL
PDB12C                         MOUNTED    n/a NORMAL

SQL>

Next we will create the procedure (given above).

image

To test the automatic starting of the pluggables, we need to shut down the container database, by issuing the shutdown command.

SQL> shutdown
Database closed.
Database dismounted.
ORACLE instance shut down.


SQL> select name,DB_UNIQUE_NAME from v$database;
select name,DB_UNIQUE_NAME from v$database
*
ERROR at line 1:
ORA-01034: ORACLE not available
Process ID: 0
Session ID: 0 Serial number: 0

This shows us that the container database is shutdown.

Now we can start the container and test to see if the pluggable database is started automatically by the trigger.

SQL> startup
ORACLE instance started.

Total System Global Area  855982080 bytes
Fixed Size                  2408408 bytes
Variable Size             562036776 bytes
Database Buffers          285212672 bytes
Redo Buffers                6324224 bytes
Database mounted.
Database opened.
SQL>

SQL> select name,DB_UNIQUE_NAME from v$database;

NAME      DB_UNIQUE_NAME
--------- ------------------------------
ORCL      orcl

SQL> select status from v$instance;

STATUS
------------
OPEN

SQL> SELECT v.name, v.open_mode, NVL(v.restricted, 'n/a') "RESTRICTED", d.status

  2  FROM v$pdbs v, dba_pdbs d
  3  WHERE v.guid = d.guid
  4  ORDER BY v.create_scn;

NAME                           OPEN_MODE  RES STATUS
------------------------------ ---------- --- -------------
PDB$SEED                       READ ONLY  NO  NORMAL
PDB12C                         READ WRITE NO  NORMAL

SQL>

We can see that the pluggable was started.

Tuesday, July 16, 2013

Installing & Setting up SQL Developer 4

The EA1 (early adopter) release of SQL Developer is now available. The main reason that I’m interested in this tools is that it has the upgraded Oracle Data Mining workflow tool. I’ve been using SQL Developer for a long, long time.  I was lucky enough to see a demo of it before it was ever released, back ……(well a long, long time ago) when Barry McGillin gave a demo of what they called Project Raptor, to a small group of (12) Oracle users in the Oracle East Point office, Dublin, Ireland. Barry was one of a couple of developers who were developing Project Raptor.
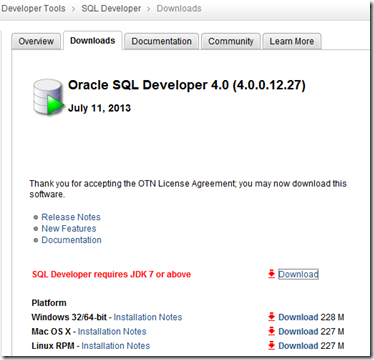
The EA1 release of SQL Developer 4 comes without the JDK install. For SQL Developer 4 you will need to install JDK 1.7.  There is a link from the SQL Developer 4 download page.
image
After installing JDK 1.7 or maybe you have it installed already, you are ready to setup SQL Developer 4. The following instructions are for installing SQL Developer 4 on Windows.
After downloading it from the download page, all you have to do is to unzip the download. There is no install program. You are almost ready to start using SQL Developer.
There are 2 types of setup for SQL Developer. The first is where you have not used SQL Developer before. Point 1 below shows what is involved with this scenario.  Point 2 below shows what is involved if you have used previous releases of SQL Developer.
0.   Common steps to installing and setting up SQL Developer
  • Unzip the SQL Developer 4 download file to a location where you want the software to be located.
  • Go down the directories to where the sqldeveloper.exe is located.
  • Create a shortcut on your desktop for this file.
  • Double click on the shortcut on your desktop
  • Enter the location where JDK 1.7 was installed
    • C:\Program Files\Java\jdk1.7.0_25
  • SQL Developer will start
image
1.   Scenario: Env. that has not used SQL Dev before
image
  • Double click on the connection to open the SQL Worksheet
  • Finally enjoy 12c Smile
2. Scenario: Previous releases of SQL Developer exist
  • When asked about importing preferences from your previous SQL Developer installation, say Yes. This will take the connections from the most recent version of SQL Developer that you have installed. If you want to change this click on the button and select the version from the list
  • The install will progress updating everything and pull in your connects.
  • When finished SQL Developer 4 will open
  • But before you get going you should test that your connections work. An easy way of doing this is to use the pingall command. Open a SQL worksheet, connect to one of your schemas (this will test that your connection works), type pingall and press F5. This will test all of your connections and tell you which ones are currently working and which connections are not (you will see a –1ms).
  • You can now enjoy SQL Developer 4.
During the install of SQL Developer 4 I had an error. After inserting the directory for Java, the progress bar of the loading window got to about 1cm, displaying Registering Extensions above it, and then the loading window closed. SQL Dev 4 did not open.  After various attempts at investigating the problem, it looks like the directory created in AppData (Windows 7) was corrupted in some way. The solution to this problem is to rename or remove the directory.
\AppData\Roaming\SQL Developer\system4.0.0.12.27
When you have renamed or removed this directory, try starting SQL Dev 4 again. Everything should work now. Well it did for me.
Many thanks to Turloch in Oracle for his help.

Monday, July 15, 2013

Installing Oracle 12c on Windows 7 64bit

Here are the steps I when through to install Oracle 12.1c on Windows 7 64 bit.

  • Unzip the two 12c downloads files into the same directory. I called this directory database

image

  • Go down a couple of levels in the database directory until you come to the directory that contains setup.exe. Double click on this to start the installer.
  • Step 1 – Configure Security Updates:  Un-tick the tick-box and click the Next button. A warning message will appear. You can click on the Yes button to proceed.
  • Step 2 – Software Update : select the Skip Software Updates option and then click the Next button.
  • Step 3 – Installation Option : select the Create and Configure a Database option and then click the Next button.
  • Step 4 – System Class: Select the Server Class option and then click the Next button
  • Step 5 – Grid Installation Options : Select the Single Instance Database Installation option and then click the next button.
  • Step 6 – Install Types : Select the Typical install option and then click the Next button.
  • Step 7 - Installation Location : Select the Use Windows Built-in Account option and then click the Next button. An warning message appears. Click the Yes button.
  • Step 8 – Typical Installation.  Set Global Database Name to cdb12c for the container database name. Set the Administrative password for the container database. Set the name of the pluggable database that will be created. Set this to pdb12c. Or you can accept the default names. Then click the Next button. If you get a warning message saying the password does not conform to the recommended standards, you can click the Yes button to ignore this warning and proceed.
  • Step 9 – Prerequisite Checks : the install will check to see that you have enough space and necessary permissions etc.
  • Step 10 – Summary – You should now be ready to start the install. Click the Install button.

You can now sit back, relax and watch the installation of 12.1c complete.

You may get some Windows Security Alert windows pop up. Just click on the Allow Access button.

image

Then the Database Configuration Assistant will start. This step might take a while to complete.

image

When everything is done you will get something like the following

image

Now you are almost ready to start using your Pluggable 12c database on windows. The final two steps that you need to do is to add an entry to your tnsnames.ora file. You can manually do this if you know what you are doing or you can select Net Configuration Assistant under the Oracle –Ora12cDB Home 1 section of the windows menu. The second thing you need to do is to create a new user/schema.

Check out my previous blog post called ‘My first steps with 12c’ for how to do these last two steps. The ‘My fist steps with 12c’ post was based on installing 12c on Linux 6.

Friday, July 12, 2013

Oracle 12c Advanced Analytics Option new features

With the release of Oracle 12c (finally) now have a lot of learning to do. Oracle 12c is a different beast to what we have been used to up to now.

As part of the 12c there are a number of new in-database Advanced Analytics features. These are separate to the Advanced Analytics new features that come as part of the Oracle Data Miner tool, that is part of SQL Developer.

This post will only look at the new features that are part of the 12c Database. The new in-Database Advanced Analytics features include:

  • Using Decisions Trees for Text analysis is now possible. Up to now (11.2g) when you wanted to do text classification you had to exclude Decision Trees from the process. This was because the Decision Trees algorithm could not support nested data.
  • Additionally for text mining some of the text processing has been moved from having a separate step, to being part of the some of the algorithms.
  • A number of additional features are available for Clustering. These include a cluster distance (from the centroid) and details functions.
  • There is a new clustering algorithm (in addition to the K-Means and O-Cluster algorithms), called Expectation Maximization algorithm. This creates a density model that can be give better results when data from different domains are combined for clustering. This algorithm will also determine the optimal number of clusters.
  • There are two new Feature Extraction methods that are scalable for high dimensional data, large number of records, for both structured and unstructured. This can be used to reduce the number of dimensions to use as input to the data mining algorithms. The first of these is called Singular Value Decomposition (SVD) and is widely used in text mining. The second method can be considered a special scoring method of SVD is called Principal Component Analysis (PCA). With this method it produces projections that are scaled with the data variance.
  • A new feature of the GLM algorithm is that it will perform a feature section step. This is used to reduce the number of predictors used by the algorithm and allow for faster builds. This will makes the outputs more understandable and model more transparent. This feature is not default so you will need to set this on if you want to use it with the GLM algorithm.
  • In previous versions of the database, there could be some performance issues that relate to the data types used. In 12c these has been addressed for BINARY_DOUBLE and BINARY_FLOAT. So if you are using these data types you should now see faster scoring of the data in 12c
  • There is new in-database feature called Predictive Queries. This allows on-the-fly models that are temporary models that are formed as part of an analytics clause. These models cannot be tuned and you cannot see the details of the model produced. They are formed for the query and do not exist afterwards.
  • SELECT cust_id, age, pred_age, age-pred_age age_diff, pred_det FROM
    (SELECT cust_id, age, pred_age, pred_det,
    RANK() OVER (ORDER BY ABS(age-pred_age) DESC) rnk FROM
    (SELECT cust_id, age,
    PREDICTION(FOR age USING *) OVER () pred_age,
    PREDICTION_DETAILS(FOR age ABS USING *) OVER () pred_det
    FROM mining_data_apply_v))
    WHERE rnk <= 5;


  • There is a new function called PREDICTION_DETAILS. This allows you to see what the algorithm used to make the prediction. For example if we want to score a customer to see if they will churn, we can use the PREDICTION and PREDITION_PROBABILITY functions to do this and to see how how strong this prediction is. With PREDICTION_DETAILS we can now see what attributes and values the algorithm used to make that particular prediction. The output is in XML format.


  • image


These are the new in-database Advanced Analytics (Data Mining) features. Apart from the new algorithms or changes to them, most of the other changes gives greater transparency into what the algorithms/models are doing. This is good as it allows us to better understand and see what is happening.


The rest of the new Advanced Analytics Option new features will be part of Oracle Data Miner tool in SQL Developer 4. My next blog post will cover the new features in SQL Developer 4.


I haven’t mentioned anything about ORE. The reason for that is that it comes as a separate install and its current version 1.3 works the same in 11.2.0.3g as well as 12c. I’ve had some previous blog posts on this and you can check out the ORE website on OTN.

DBMS_PREDICTIVE_ANALYTICS & Profile

In this blog post I will look at the PROFILE procedure that is part of the DBMS_PREDICTIVE_ANALYTICS package. The PROFILE procedure generates rules that identify the records that have the same target value.

Like the EXPLAIN procedure, the PROFILE procedure only works with classification type of problems. What the PROFILE procedure does is it works out some rules that determine a particular target value. For example, what rules determine if a customer will take up an affinity card and the rules for those who do not take up an affinity card. So you will need a pre-labelled data set with the value of the target attribute already determined.

Oracle does not tell us what algorithm that they use to calculate these rules, but they are similar to the rules that are produced by some of the classification algorithms that are in the database (and can be used by ODM).

The syntax of the PROFILE procedure is

DBMS_PREDICTIVE_ANALYTICS.PROFILE (
     data_table_name           IN VARCHAR2,
     target_column_name        IN VARCHAR2,
     result_table_name         IN VARCHAR2,
     data_schema_name          IN VARCHAR2 DEFAULT NULL);

Where

Parameter Name Description
data_table_name Name of the table that contains the data that you want to analyze.
target_column_name The name of the target attribute.
result_table_name The name of the table that will contain the results. This table should not exist in your schema, otherwise an error will occur
data_schema_name The name of the schema where the table containing the input data is located. This is probably in your current schema, so you can leave this parameter NULL.

The PROFILE procedure will produce an output table called ‘result_table_name) in your schema and this table will contain 3 attributes.

PROFILE_ID This is the PK/unique identifier for the profile/rule
RECORD_COUNT This is the number of records that are described by the profile/rule
DESCRIPTION This is the profile rule and it is in XML format and has the following XSD

<xs:element name="SimpleRule">
  <xs:complexType>
    <xs:sequence>
      <xs:group ref="PREDICATE"/>
      <xs:element ref="ScoreDistribution" minOccurs="0" maxOccurs="unbounded"/>
    </xs:sequence>
    <xs:attribute name="id" type="xs:string" use="optional"/>
    <xs:attribute name="score" type="xs:string" use="required"/>
    <xs:attribute name="recordCount" type="NUMBER" use="optional"/>
  </xs:complexType>
</xs:element>

Using the examples I have used in my previous blog posts, the following illustrates how to use the PROFILE procedure.

BEGIN
   DBMS_PREDICTIVE_ANALYTICS.PROFILE(
      DATA_TABLE_NAME    => 'mining_data_build_V',
      TARGET_COLUMN_NAME => 'affinity_card',
      RESULT_TABLE_NAME  => 'PA_PROFILE');
END;

image

image


NOTE: For the above examples I used and 11.2.0.3 database.

Thursday, July 11, 2013

My first steps with Oracle 12c

Oracle 12c was released just over a week ago and I’ve finally managed to get round to installing it.
This must be the first time that I have done an install of an newly release Oracle Database, where everything worked first time.  Typically I have learned from the past and have left it a few months before attempting an install.
Many thanks to Tim Hall (www.oracle-base.com) for his install instructions for Linux 6 and Oracle 12c. These are a lot simpler to follow than the actual Oracle Install documentation.
After the install had finished I was able to log into the Database Express webpage on the server. This is a cut down version of the old EM and it looks like Oracle is pushing everyone to their standalone EM tool.
[The following is what I did. I’m sure there are better and quicker ways of doing the following]
I had rebooted the VM I created for 12c and when I logged back in I could not log into the container DB or to Database Express. After a bit of digging around I found out that I needed to create a could of scripts that will run every time the VM is started so that it will start the DBs. So to get things (DB) started I ran
sqlplus / as sysdba
This got be logged into the container in nomount mode. Now I needed to start the container with the START command.
SQL> startup
ORACLE instance started.

Total System Global Area  839282688 bytes
Fixed Size            2293928 bytes
Variable Size          578817880 bytes
Database Buffers      255852544 bytes
Redo Buffers            2318336 bytes
Database mounted.
Database opened.
SQL> show user
USER is "SYS"

To see the container DB details
SQL> select name,DB_UNIQUE_NAME from v$database;
NAME      DB_UNIQUE_NAME
--------- ------------------------------
CDB12C      cdb12c

and to see its current status
SQL> select status from v$instance;
STATUS
------------
OPEN

To see what pluggable DBs you have
SQL> SELECT v.name, v.open_mode, NVL(v.restricted, 'n/a') "RESTRICTED", d.status
FROM v$pdbs v, dba_pdbs d
WHERE v.guid = d.guid
ORDER BY v.create_scn;  2    3    4 

NAME                           OPEN_MODE  RES STATUS
------------------------------ ---------- --- -------------
PDB$SEED                       READ ONLY  NO  NORMAL
PDB12C                         MOUNT      NO  NORMAL

If PDB12C has an OPEN_MODE of MOUNT do the following to open the pluggable database
SQL> ALTER PLUGGABLE DATABASE pdb12c OPEN;  
(I previous had  START instead of OPEN)
To see what active services I have
SQL> select name FROM v$active_services;
NAME
----------------------------------------------------------------
pdb12c.localdomain
cdb12cXDB
cdb12c.localdomain
SYS$BACKGROUND
SYS$USERS

To create a new schema in the PDB (pdb12c) I did
sqlplus / as sysdba
SQL> ALTER SESSION SET CONTAINER = pdb12c;
SQL> create user brendan identified by brendan
  2  default tablespace users
  3  temporary tablespace temp;

User created.
SQL> grant connect, resource to brendan1;
Grant succeeded.
SQL>
Next I opened the listener and reloaded to take in the services and the PDB that I wanted to use called PDB12c.
oracle@Oracle-12-1c etc]$ lsnrctl
LSNRCTL for Linux: Version 12.1.0.1.0 - Production on 09-JUL-2013 15:26:50
Copyright (c) 1991, 2013, Oracle.  All rights reserved.
Welcome to LSNRCTL, type "help" for information.
LSNRCTL> help
The following operations are available
An asterisk (*) denotes a modifier or extended command:

start           stop            status          services       
version         reload          save_config     trace          
spawn           quit            exit            set*           
show*          

LSNRCTL> reload
Connecting to (DESCRIPTION=(ADDRESS=(PROTOCOL=IPC)(KEY=EXTPROC1521)))
The command completed successfully
LSNRCTL> services
Connecting to (DESCRIPTION=(ADDRESS=(PROTOCOL=IPC)(KEY=EXTPROC1521)))
Services Summary...
Service "cdb12c.localdomain" has 1 instance(s).
  Instance "cdb12c", status READY, has 1 handler(s) for this service...
    Handler(s):
      "DEDICATED" established:0 refused:0 state:ready
         LOCAL SERVER
Service "cdb12cXDB.localdomain" has 1 instance(s).
  Instance "cdb12c", status READY, has 1 handler(s) for this service...
    Handler(s):
      "D000" established:0 refused:0 current:0 max:1022 state:ready
         DISPATCHER <machine: Oracle-12-1c.localdomain, pid: 3138>
         (ADDRESS=(PROTOCOL=tcp)(HOST=Oracle-12-1c.localdomain)(PORT=27389))
Service "pdb12c.localdomain" has 1 instance(s).
  Instance "cdb12c", status READY, has 1 handler(s) for this service...
    Handler(s):
      "DEDICATED" established:0 refused:0 state:ready
         LOCAL SERVER
The command completed successfully
LSNRCTL> exit

Next I needed to add an entry for the PDB into the tnsnames.ora file located in
/u01/app/oracle/product/12.1.0/db_01/network/admin
and added the following for the PDB and saved the tnsnames.ora file.
PDB12C =
  (DESCRIPTION =
    (ADDRESS = (PROTOCOL = TCP)(HOST = Oracle-12-1c.localdomain)(PORT = 1521))
      (CONNECT_DATA =
      (SERVER = DEDICATED)
      (SERVICE_NAME = PDB12C.localdomain)
      )
  )

Then I was able to connect to the PDB for my ‘brendan’ schema
[oracle@Oracle-12-1c etc]$ sqlplus brendan/brendan@pdb12c
SQL*Plus: Release 12.1.0.1.0 Production on Tue Jul 9 17:22:30 2013
Copyright (c) 1982, 2013, Oracle.  All rights reserved.
Last Successful login time: Tue Jul 09 2013 15:29:18 +01:00
Connected to:
Oracle Database 12c Enterprise Edition Release 12.1.0.1.0 - 64bit Production
With the Partitioning, OLAP, Advanced Analytics and Real Application Testing options

SQL>

I hope you might find this useful.  All of the above are my notes and for me to remember what I did on my first time using 12c.

Monday, July 8, 2013

12c Roundup so far and Events

I’m on vacation at the moment. As a result I’ve missed all the 12c launch and excitement that goes with it. I’ve managed to get a few minutes to put this post together. The aim of this post is to list some interesting blog posts (by other people over the past few days). I intend to expand the list when I get time.

I also wanted to highlight two 12c launch events. The first of these is the official Oracle 12c webcast. It is on Wednesday 10th July. Click on the following image to register etc. The webcast will have Mark Hurd, Andy Mendelsohn and Tom Kyte.

image

The second 12c launch event will be hosted by Oracle in Ireland. This will be on the 5th September in the Gibson Hotel (Dublin) between  13:00 and 17:30.  I believe their might be some 12c goodies available for the attendees. Again click on the image below to register and to check out the agenda.

image

The following are some articles and blog posts that have been published since 12c has been launched. This is not a complete list or and indication of quality, but I’ve noted them for me to come back to after my vacation to read. You might have come across others. If so let me know and I will add them to the list.

12.1c Download page

12.1c Documentation page

12.1c New Features Guide

Oracle Advanced Analytics Option 12c and SQL Dev 4 new features

Oracle Database 12c: Oracle Multitenant Option

Oracle website for Multitenent 

New DB12c feature involves invisibility

12c - SQL Text Expansion

Ever expanding SQL for 12c

Oracle 12c Magazine by @leight0nn in Flipboard

How long can you hold off on Oracle 12c

Oracle 12c Install articles by Tim Hall (oraclebase) on Linux5 and Linux6


Over the coming weeks (after my vacation) I will be posting some articles on the Advanced Analytics Option in 12c. There are a number of new features. Also when SQL Developer 4 comes out I will be including all the new functionality that is included in the updated ODM tool.

Thursday, June 27, 2013

Oracle Magazine-Jan/Feb 2000

The headline articles of Oracle Magazine for January/February 2000 were focused on looking forward to what is to come, now that the year 2000 bomb. These articles include large scale, 24x7 data warehouses and marts, more development using Java, more and better B2B with XML.

This issue of Oracle Magazine introduced a new layout and design.

image

Other articles included:

  • an Introduction of XML was given, including some basics, the differences between XSL, XSLT and XCETERA, how XML can be used with Oracle, and in the Oracle Internet Platform
  • Building mobile apps with Oracle 8i Lite’s Web-to-go. Oracle 8i Lite includes, Oracle Lite DBMS, iConnect and Web-to-go. An example was given on how to create a Web-to-go Servlet. An overview of the development process was given that included, create the database tables, compile the java servlet code, register the application and then test drive the application.
  • Creating packages and procedures by using invoker rights can increase code reuse, simplify maintenance and exercise more control over security. Some examples were given to illustrate how this can be all be done.
  • Oracle WebDB 2.1 allows everyone to build website without having to rely on a webmaster.
  • Experienced Oracle DBAs know that I/O is the single greatest component of response time. When Oracle retrieves a block from a data file on disk, the reading process must wait for the physical I/O operation to complete. Consequently anything you can do to minimize I/O or reduce bottlenecks can greatly improve the performance of an Oracle system.

To view the cover page and the table of contents click on the image at the top of this post or click here.
My Oracle Magazine Collection can be found here. You will find links to my blog posts on previous editions and a PDF for the very first Oracle Magazine from June 1987.

Monday, June 17, 2013

Oracle Magazine-Nov/Dec 1999

The headline articles of Oracle Magazine for November/December 1999 were E-Business and how you can use the Oracle product set to put your business online. These articles included features on companies such as AMR, Fogdog, Cognitiative, Drug Emporium, Click-fil-A, Living, CD Now, Trilux and Lycos Networks.
image
Other articles included:
  • Oracle Developer and Developer Server 6i was released. These new tools also form the underlying technology for the Oracle Applications release 11i.
  • We also have the launch of Oracle Designer 6i with new features including: Repository based configuration management, support for files and folders, detailed dependency analysis, enhanced support for Oracle 8i server generation, enhanced generation of Oracle Developer Forms and visual repository extensibility.
  • Oracle releases the Oracle Discoverer Y2K Assistance. This was workbook identifies possible Y2K errors in the end user layer
  • Oracle Express 6.3 is released.
  • Oracle 8i is released for the Apple Macintosh
  • Oracle JDeveloper Modeling Tools are scheduled for release in early 2000 and will provide an single integrated toolset that will include: the Unified Modelling Language (UML) support, Java editing, compiling and debugging, Java runtime component framework for persistence and transactions, Multi-user repository for managing models as well as files, and Deployment to choice of servers in an n-tier environment.
  • The Business and Accounting Software Developers Association and the German Association for Technical Inspection have certified Oracle Financials Release 11 for Euro (€) compliance.
  • Donald Burleson has an article on Tuning Disk I/O in Oracle 8. Be sure to tune your SQL before you start to reorganise your disks.The article looks at how you can investigate if a disk becomes stalled while handling simultaneous I/O request and proposes a couple of ways you can address these issues.
  • Joe Johnson’s article on Using Oracle Database Auditing to Tune Performance looks at how you can tune the components of the SGA, in particular the shared pool and the database buffer cache.
As this was the Oracle Open World edition you can imagine that there was a large number of advertisements in the magazine.
To view the cover page and the table of contents click on the image at the top of this post or click here.
My Oracle Magazine Collection can be found here. You will find links to my blog posts on previous editions and a PDF for the very first Oracle Magazine from June 1987.

Wednesday, June 12, 2013

Part 3–Getting start with Statistics for Oracle Data Science projects

This is the Part 3 blog post on getting started with Statistics for Oracle Data Science projects.

The table below is a collection of most of the statistical functions in Oracle 11.2. The links in the table bring you to the relevant section of the Oracle documentation where you will find a description of each function, the syntax and some examples of each.

ABS

LENGTH2

REGR_AVGX

ACOS

LENGTH4

REGR_ACGY

Aggregrate functions

LENGTHB

REGR_COUNT

Analytic functions

LENGTHC

REGR_INTERCEPT

Arithmetic operators

LN

REGR_R2

ASIN

LNNVL

REGR_SLOPE

ATAN

LOG

REGR_SXX

ATAN2

LOWER

REGR_SXY

AVG

LPAD

REGR_SYY

CAST

LTRIM

ROLLUP clause

Comparison functions

MAX

ROUND

CONCAT

MEDIAN

SAMPLE

CORR

MIN

SIN

CORR_K

MOD

SINH

CORR_S

MODEL clause

SQRT

COS

NTH_VALUE

STATS_BINOMIAL_TEST

COSH

Numeric Functions

STATS_CROSSTAB

COUNT

PERCENT_RANK

STATS_F_TEST

COVAR_POP

PERCENTILE_CONT

STATS_KS_TEST

COVAR_SAMP

PERCENTILE_DISC

STATS_MODE

CUBE clause

Pivot operations

STATS_MW_TEST

CUME_DIST

POWER

STATS_ONE_WAY_ANOVA

CV

PREDICTION

STATS_T_TEST_INDEP

Data functions

PREDICTION_BOUNDS

STATS_T_TEST_INDEPU

DENSE_RANK

PREDICTION_COST

STATS_T_TEST_ONE

EXP

PREDICTION_PROBABILITY

STATS_T_TEST_PAIRED

FLOOR

PREDICTION_SET

STATS_WSR_TEST

GREATEST

PRESENTNNV

STDDEV

Grouping Sets

PRESENTNTV

STDEEV_POP

INTERSECT

Prior clause

STDDEV_SAMP

Interval arithmetic

PRIOR

SUM

INTERVAL

RANK

TAN

Julian dates

RAWTOHEX

TANH

LAG

REGEXP_COUNT

t-test

LAST

REGEXP_INSTR

VAR_POP

LEAD

REGEXP_LIKE

VAR_SAMP

LEAST

REGEXP_REPLACE

VARIANCE

LENGTH

REGEXP_SUBSTR

WIDTH_BUCKET

The list about may not be complete (I’m sure it is not), but it will cover most of what you will need to use in your Oracle projects.

If you come across or know of other useful statistical functions in Oracle let me know the details and I will update the table above to include them.

Friday, June 7, 2013

DBMS_PREDICTIVE_ANALYTICS & Predict

In this blog post I will look at the PREDICT procedure that is part of the DBMS_PREDICTIVE_ANALTYICS package. This package allows you to perform data mining in an automated way without having to go through the steps of building, testing and scoring data.

I had a previous blog post that showed how to use the EXPLAIN function to create an Attribute Importance model.

The predictive analytics procedures analyze and prepare the input data, create and test mining models using the input data, and then use the input data for scoring. The results of scoring are returned to the user. The models and supporting objects are not persisted and are removed from the database when the procedure is finished.

The PREDICT procedure should only be used for a Classification problem and data set.

The PREDICT procedure create a model based on the supplied data (out input table) and a target value,  and returns scored data set in a new table. When using PREDICT you do not get to select an algorithm to use.

The input data source should contain records that already have the target value populated.  It can also contain records where you do not have the target value. In this case the PREDICT function will use the records that have a target value to generate the model. This model will then score all records a the predicted target value

The syntax of the PREDICT procedure is:

DBMS_PREDICTIVE_ANALYTICS.PREDICT (
   accuracy OUT NUMBER,
   data_table_name IN VARCHAR2,
   case_id_column_name IN VARCHAR2,
   target_column_name IN VARCHAR2,
   result_table_name IN VARCHAR2,
   data_schema_name IN VARCHAR2 DEFAULT NULL);

Where

Parameter Name Description
accuracy This output parameter from the procedure. You do not pass anything into this parameter. The Accuracy value returned is the predictive confidence of the model generated/used by the PREDICT procedure
data_table_name The name of the table that contains the data you want to use
case_id_column_name The case id for each record. This is unique for each record/case.
target_column_name The name of the column that contains the target column to be predicted
result_table_name The name of the table that will contain the results. This table should not exist in your schema, otherwise an error will occur.
data_schema_name The name of the schema where the table containing the input data is located. This is probably in your current schema, so you can leave this parameter NULL.

The PREDICT procedure will produce an output tables (result_table_name parameter) and will contain 3 attributes.

CASE_ID This is the Case Id of the record from the original data_table_name. This will allow you to link up the data in the source table to the prediction in the result_table_name
PREDICTION This will be the predicted value of the target attribute
PROBABILITY This is the probability of the prediction being correct

Using the sample example data set that I have given in previous blog posts and in the blog post on the EXPLAIN procedure, the following code illustrates how to use the PREDICT procedure.

set serveroutput on

DECLARE
   v_accuracy NUMBER(10,9);
BEGIN
   DBMS_PREDICTIVE_ANALYTICS.PREDICT(
      accuracy => v_accuracy,
      data_table_name => 'mining_data_build_v',
      case_id_column_name => 'cust_id',
      target_column_name => 'affinity_card',
      result_table_name => 'PA_PREDICT');
   DBMS_OUTPUT.PUT_LINE('Accuracy of model = ' || v_accuracy);
END;

image

This took about 15 seconds to run on my laptop, which is surprisingly quick given all the work that is doing internally. To see the predictions and the results from the PREDICT procedure, you will need to query the PA_PREDICT table.

image

The final step that you might be interested in is to compare the original target value with the prediction value.

SELECT v.cust_id,
       v.affinity_card,
       p.prediction,
       p.probability
FROM   mining_data_build_v  v,
       pa_predict p
WHERE  v.cust_id = p.cust_id
AND    rownum <= 12;

image

Remember we do not get to see how or what Oracle did to generate these results. We do not get the opportunity to tune the process and the model.

So you have to be careful when you use the PREDICT function and on what data. Would you use this as a way to explore your data and to see if predictive analytics/data mining might be useful for your? Yes it would. Would you use it in a production scenario? the answer is maybe but it depends on the scenario. In reality if you want to do this in a production environment you will put some work into developing data mining models that best fit your data. To do this you will need to move onto the ODM tool and the DBMS_DATA_MINING package. But the PREDICT function is a quick way to get some small data scored (in some way) based on your existing data. If your marketing department says they want to start a tele marketing campaign in a couple of hours then PREDICT is what you need to use. It may not give you the most accurate of results, but it does give you results that you can start using quickly.